When we bought our house almost 3 years ago we didn't inherit a lovely back patio like I'd wanted. All we got was a 10'x10' concrete slab that I guess you can call a "back patio". We've talked about putting a cover up but knew right now we did not feel like spending tons of money. Well I still needed some sort of shade because I was NOT sitting in the South's Summer sun and heat uncovered. So for Mothers Day my parents bought me a market style umbrella and stand (along with outdoor pillows). Well after putting the umbrella in the stand I quickly realized it was not going to stand on it's own completely upright so I knew I needed to build a coffee table to give it a little more stabilization. Plus putting it in the center of a coffee table meant it would cover everything evenly. This is a simple build and anyone can do it. Before building, take all necessary precautions to build safely. Work on a clean level surface.
List of things I used:
safety glasses
compound miter saw
drill
Kreg pocket hole system
Kreg 2.5" pocket hole screws
2.5" regular wood screws
6 - 2x4's
1 - 2x6
First I cut all my wood. The size of this table is 33.5" x 33.5". You can make this table any size to fit your area, adjust cuts as needed. Below you will find a list of cuts for this size table. I wanted to use a 2x6 as the center top piece because I knew I was going to drill a hole for the umbrella, so I needed to make sure it still had enough room on each side of the hole for the wood not to split.

8 - 2x4 @ 33.5" tops
1 - 2x6 @ 33.5" center top
4 - 2x4 @ 14.5" legs
2 - 2x4 @ 24" short apron
2 - 2x4 @ 28" long apron
Next you want to drill pocket holes on each end of the apron pieces. I used my Kreg pocket hole system for this.

8 - 2x4 @ 33.5" tops
1 - 2x6 @ 33.5" center top
4 - 2x4 @ 14.5" legs
2 - 2x4 @ 24" short apron
2 - 2x4 @ 28" long apron
Next you want to drill pocket holes on each end of the apron pieces. I used my Kreg pocket hole system for this.
Then you want to start putting your base together.

After its all togther it should look like this. I just went ahead and made the other two apron pieces flush with the legs instead of setting them back an inch. And I don't know why it looks rectangular in the photo but it is square. It should be 31"x31".

Now there are two different ways I know of to do your top piece. You can screw straight into the top boards like I did (if you do that, it is best to pre-drill your holes), or you can pocket hole it together. You do that by drilling pocket holes on the underside of each top board then screw it all together to make one solid top. If you do that, then you want to make sure that you drill pocket holes on the inside of the apron pieces so you can screw the top on from underneath.


Then I had my husband drill the hole for the umbrella.

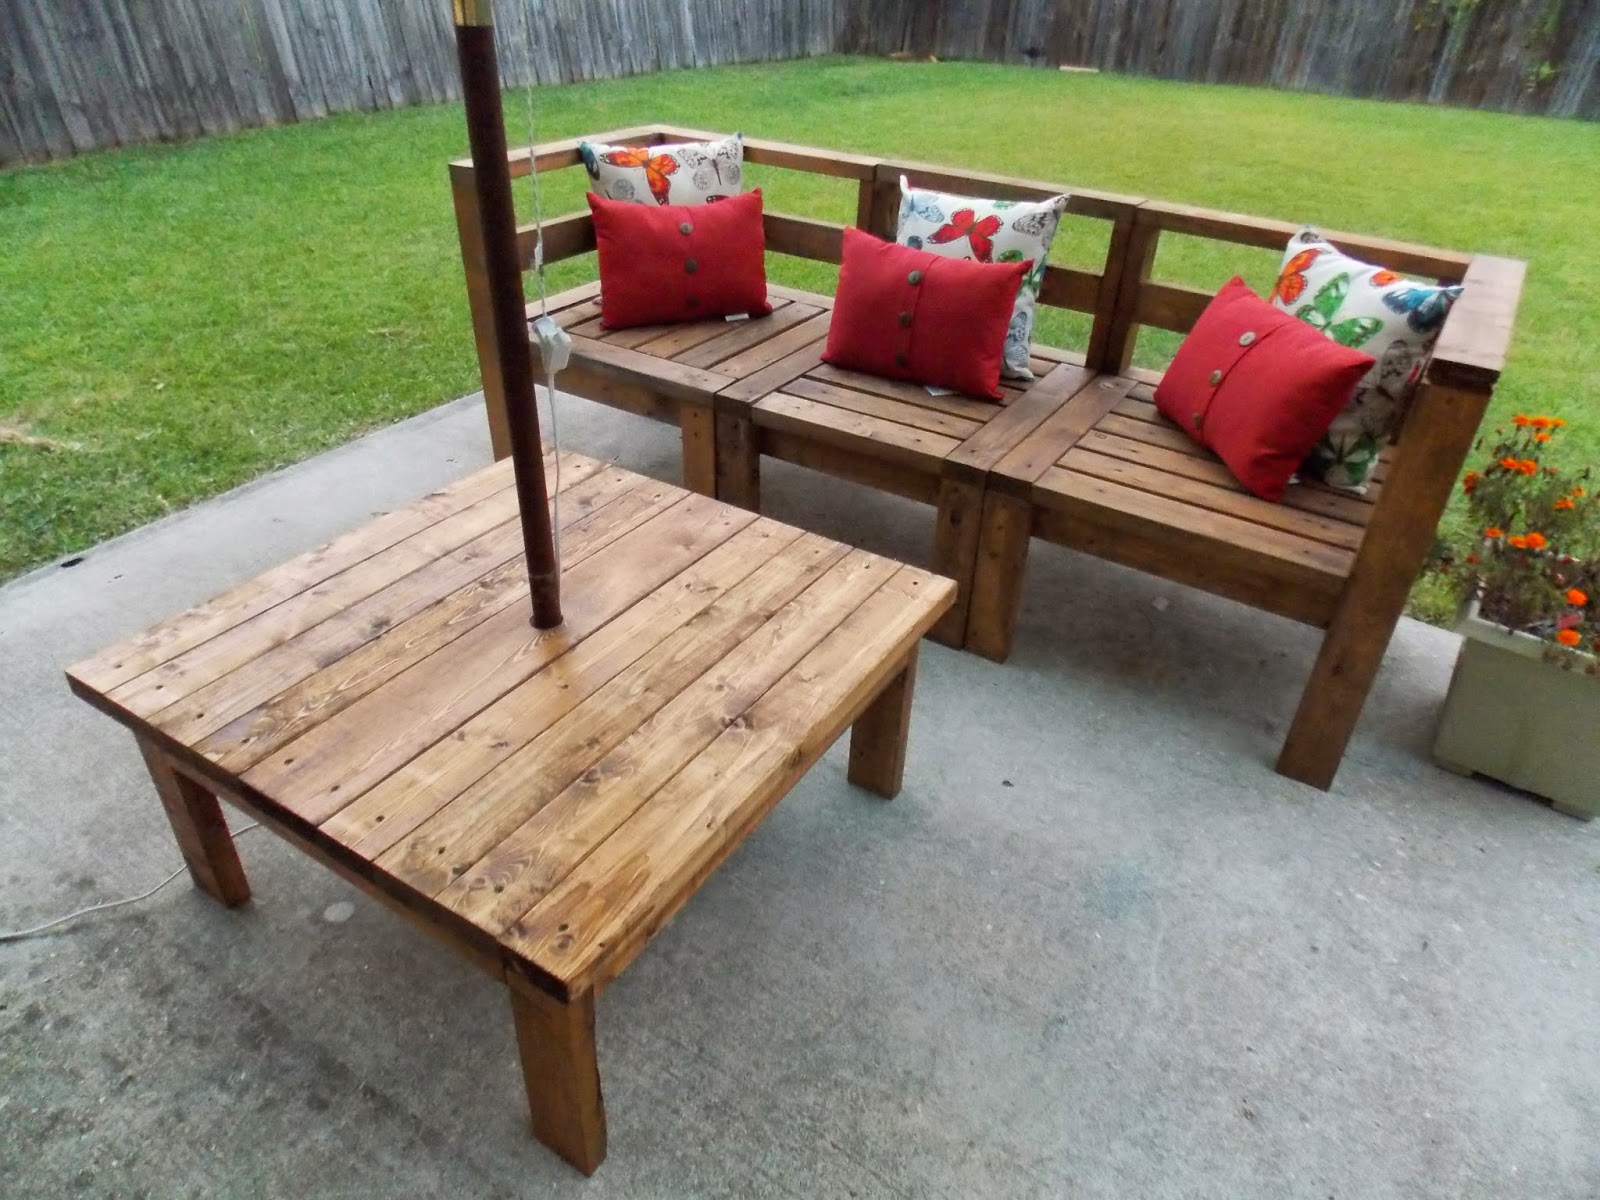
When it's all built you just stain. I actually used a deck stain since I knew it was going to be in the weather. Its Olympic Elite in semi-transparent tinted Dark Bark. And I don't know why the sectional is darker when I used the same stain. Hopefully the table will darken over time.


And the finished table with the partially finished outdoor sectional.
I hope everyone enjoys this little tutorial! Now it's off to grocery shop and clean :)
No comments:
Post a Comment