Showing posts with label diy. Show all posts

Wednesday, August 6, 2014

Leaning Chalkboard

   Well my oldest three boys start back to school tomorrow and can not believe summer is over. I know they are excited to go back and see all their friends again! I have one who is starting his last year in Jr. High, one who is starting his first year in Jr. High and one that is starting his last year in Elementary. But next year our youngest will start Kindergarten and that will be a bucket full of emotions :(

   Now on to the leaning chalkboard....We used to have a big chalkboard wall upstairs when we moved in that I spruced up a bit from the previous owners by framing it with wood (picture below), but last year that all came down and was painted over. Since then I have been wanting to incorporate another one but knew I did not want it painted on the wall again. Well two good friends of mine came over the other night and one of them brought a chalkboard to do for her daughters first day at dance and it came out so cute! It got me thinking that I wanted something similar. So I went to Hobby Lobby and didn't like anything they had so I came up with the idea that I would make my own. I knew what I wanted, big and stained, but wanted to check out Pinterest anyway....There I found several other people who had already done one in the vision that I was going for. When you walk in my front door that wall is one of the first things you see. Before this there was my youngest sons table and chairs with the school stuff I have been teaching him. I didn't like how that was one of the first things you saw so all of that went in his bedroom.


I am very pleased with how it came out and you can make one too!

Supplies I used:

chalkboard paint
3 - 1x6x6
Kreg jig
1.25" pocket hole screws
4x8 sheet of lauan
stain
paint brush or roller
miter saw
small finishing nails
hammer

The completed size of this is 34"x79.75". Don't forget to take all precautions and build carefully.


For the lauan I had Lowes cut it at 70"x24"
2 - 1x6 @ 34"
2 - 1x6 @ 69"

Next you want to drill your pocket holes. For this frame I drilled them into the two short pieces. I did 3 on each end as pictured below.


Next you want to build your frame.


I forgot to take a picture of it stained before I started painting the chalkboard on the lauan but I'm sure you know what it would look like. Also because this was going to be leaning, I stained both sides of the frame. Now in this picture it's the backside of the frame that I have the lauan on to paint. It was way to hot outside to paint so this was the only way to do it. I put two coats of chalkboard paint on to insure you could not see the wood. Now, I used a paintbrush but would highly recommend using a small roller, you can see brush marks on mine.


Now what you want to do when it's dry is flip over the lauan and tack it in to place. I put a lot, like every 3 inches to make sure when I flipped it over there were no gaps between the 1x6 and lauan. Also since I have mine leaning I used regular black paint to paint the backside of the lauan. And there you go, a big leaning chalkboard! I plan on writing quotes and cute sayings on mine, also things to go with the different seasons or other events :)


Now I'm going to get things ready for the boys for their first day back to school!


Monday, August 4, 2014

Outdoor coffee table

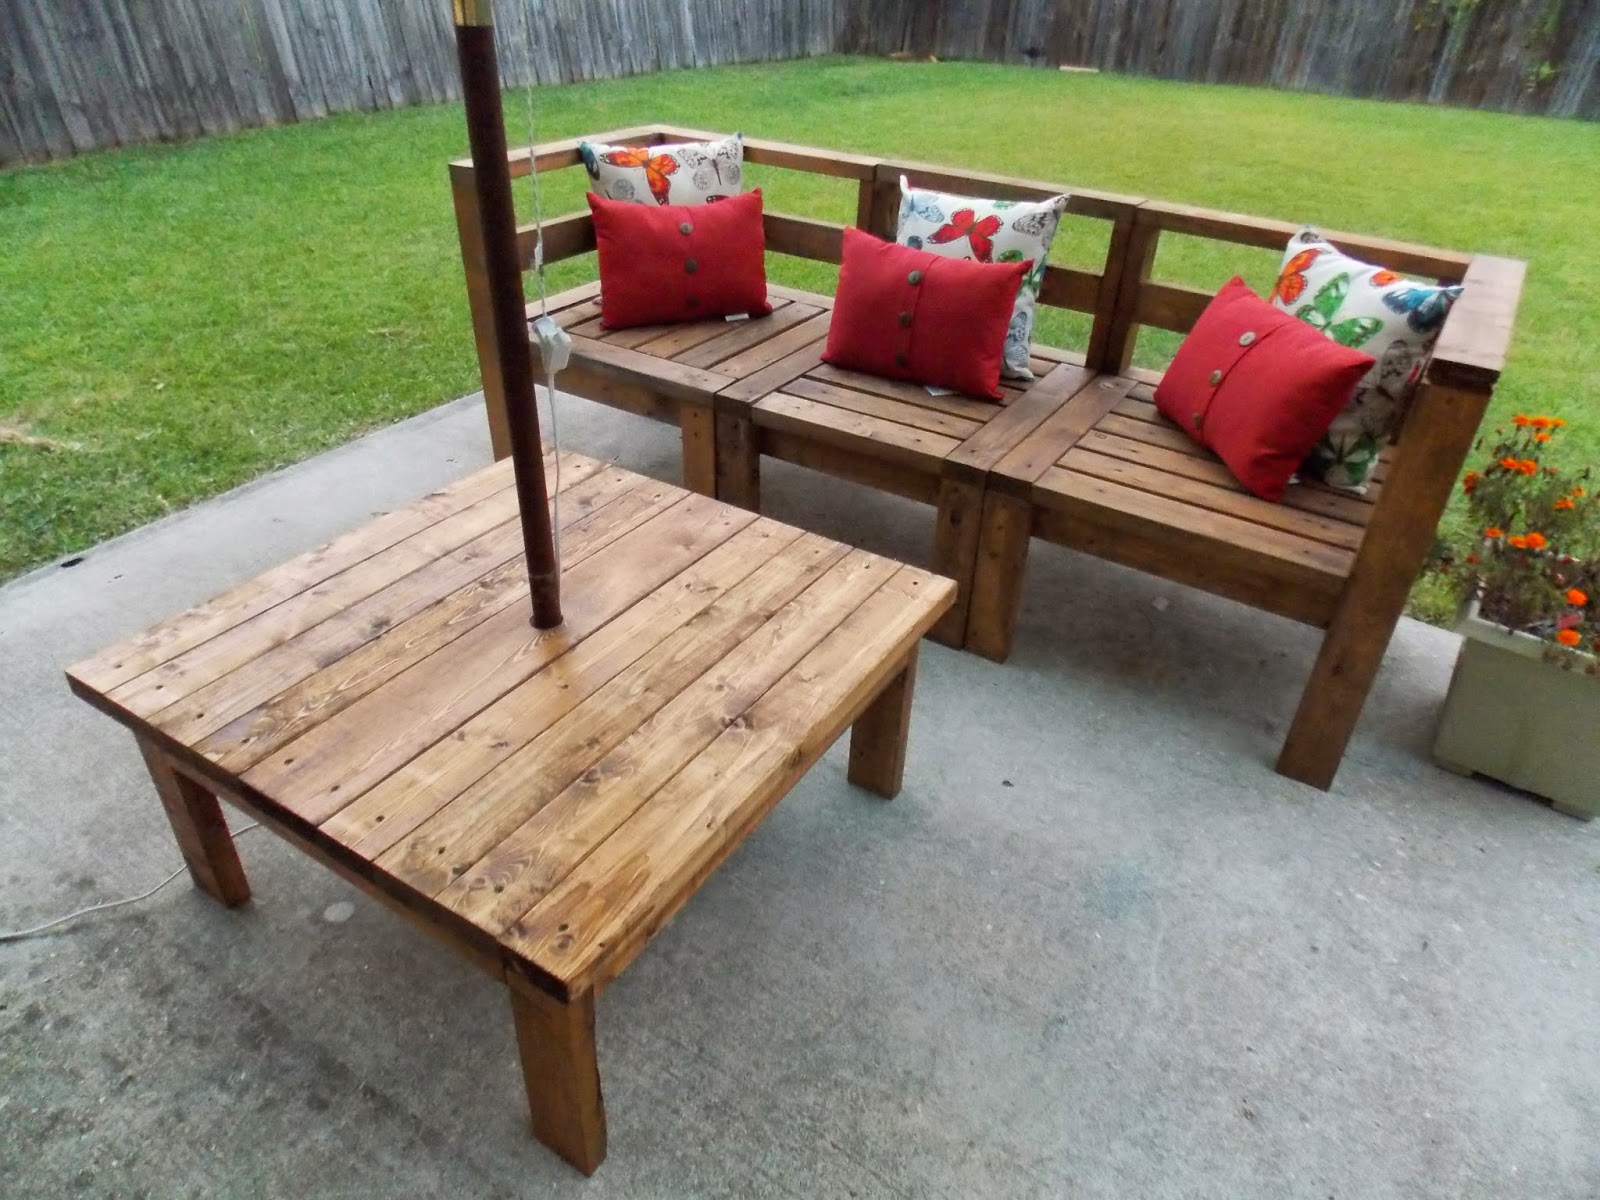
  I'm excited to share my first real blog post and how I made my outdoor coffee table! A couple of months ago I decided I wanted an outdoor space for me to sit and drink coffee in the morning or sit in the afternoon to watch the kids play in the back yard.


  When we bought our house almost 3 years ago we didn't inherit a lovely back patio like I'd wanted. All we got was a 10'x10' concrete slab that I guess you can call a "back patio". We've talked about putting a cover up but knew right now we did not feel like spending tons of money. Well I still needed some sort of shade because I was NOT sitting in the South's Summer sun and heat uncovered. So for Mothers Day my parents bought me a market style umbrella and stand (along with outdoor pillows). Well after putting the umbrella in the stand I quickly realized it was not going to stand on it's own completely upright so I knew I needed to build a coffee table to give it a little more stabilization. Plus putting it in the center of a coffee table meant it would cover everything evenly. This is a simple build and anyone can do it. Before building, take all necessary precautions to build safely. Work on a clean level surface.

List of things I used:

safety glasses
compound miter saw
drill
Kreg pocket hole system
Kreg 2.5" pocket hole screws
2.5" regular wood screws
6 - 2x4's
1 - 2x6

First I cut all my wood. The size of this table is 33.5" x 33.5". You can make this table any size to fit your area, adjust cuts as needed. Below you will find a list of cuts for this size table. I wanted to use a 2x6 as the center top piece because I knew I was going to drill a hole for the umbrella, so I needed to make sure it still had enough room on each side of the hole for the wood not to split.


8 - 2x4 @ 33.5" tops
1 - 2x6 @ 33.5" center top
4 - 2x4 @ 14.5" legs
2 - 2x4 @ 24" short apron
2 - 2x4 @ 28" long apron

Next you want to drill pocket holes on each end of the apron pieces. I used my Kreg pocket hole system for this.


Then you want to start putting your base together.


After its all togther it should look like this. I just went ahead and made the other two apron pieces flush with the legs instead of setting them back an inch. And I don't know why it looks rectangular in the photo but it is square. It should be 31"x31".


Now there are two different ways I know of to do your top piece. You can screw straight into the top boards like I did (if you do that, it is best to pre-drill your holes), or you can pocket hole it together. You do that by drilling pocket holes on the underside of each top board then screw it all together to make one solid top. If you do that, then you want to make sure that you drill pocket holes on the inside of the apron pieces so you can screw the top on from underneath.


Then I had my husband drill the hole for the umbrella.


When it's all built you just stain. I actually used a deck stain since I knew it was going to be in the weather. Its Olympic Elite in semi-transparent tinted Dark Bark. And I don't know why the sectional is darker when I used the same stain. Hopefully the table will darken over time.


And the finished table with the partially finished outdoor sectional.


I hope everyone enjoys this little tutorial! Now it's off to grocery shop and clean :)